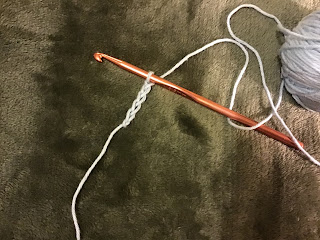
Double Crochet
1. Make a foundation chain to start.
2. Insert the hook into the 2nd chain from the hook. ( the 1st chain is the turning chain)
3. Wrap the yarn around the hook, from the back and over the hook.
4. You can insert the hook into both parts of the v or just the top one. ( I like to use just the top part of the v)
5. Holding the foundation chain with your other hand, draw a loop through this chain.
6. There are now 2 loops on the hook.
7. Next yrh and draw a loop through both loops on the hook.
8. As you use the yarn, allow it to flow through the fingers of your free hand, tensioning softly as you work.
9. This completes the 1st Double Crochet.
10. Continue across the foundation chain, working one Double Crochet into each chain in this way.
11. At the end of the row, chain one and turn your work, ready for the next row.
12. This chain brings the work up to the height ready for the next row.
13. Work the 1st Double Crochet into the top of the 1st stitch in the row below.
14. Insert your hook into both parts of the v stitch.
15. Continue this until the end of the row. It is a good idea to count the stitches as you go so you know when you have reached the last stitch.
16. Note- While learning it can be difficult to see the last stitch.
17. At the end of the row, work the last stitch into the top of the last Double Crochet of the row below.
18. Work all following rows in this way.
19. When your piece is complete cut the yarn leaving a long tail for sewing.
20. Pull up the final loop and remove from the hook, then pass the yarn through this loop and pull to secure.
Beautiful Bespoke Handmade Crochet Fingerless Gloves and Accessories! CreateCrochet.co.uk Crochet and Knitted Gifts Inspired by Nature! Step into the world of artisanal gifts with CreateCrochet. All made with the attention to detail, great care and passion. Colourful, fun and funky designs for Men, Women and Children. We strive for a brand that is beautiful, bespoke and handmade. If you can relate to this feel free to browse our Website today!
Tuesday 21 July 2020
Monday 6 July 2020
Chain Stitches and The Foundation Chain
Chain Stitches and the Foundation Chain
Making a Foundation Chain
1. Start with a slip knot on the hook.
2. Wrap the yarn around the hook, (yrh).
3. Move your hook under the yarn at the same time as you move the yarn slightly forwards.
4. With the yarn gripped by the tip, draw a loop of yarn through the loop on the hook.
5. Hold the base of the slip knot with your free fingers.
6. This completes the first chain.
7. Yrh and draw a loop through the loop on the hook for each new chain made.
8. Continue making these chains in the same way until you have the required number.
9. The back of the foundation chain has little bumps along it, while the front of the chain shows little v’s.
10. It is useful to count the chains as you go.
11. Recount each chain before beginning your project.
Subscribe to:
Posts (Atom)


